Ultimate Guide of Performance Priority Mode Capcut.
How to Optimize Performance Priority Mode in CapCut
CapCut, a popular video editing software, offers a Performance Priority mode to address lagging playback issues on PC. In this article, we’ll delve into the details of this mode and how it can enhance your editing experience.
Identifying the Issue
One common frustration for CapCut users is encountering lag during video playback, especially when reviewing edits. This can hinder the editing process and impact overall productivity. However, the Performance Priority mode serves as a solution to this problem.
Using Performance Priority Mode in CapCut for Smooth Playback
Accessing Performance Priority Mode
To access Performance Priority mode in CapCut on PC, follow these simple steps:
- Navigate to Player Settings: Click on the three lines under the Player section.
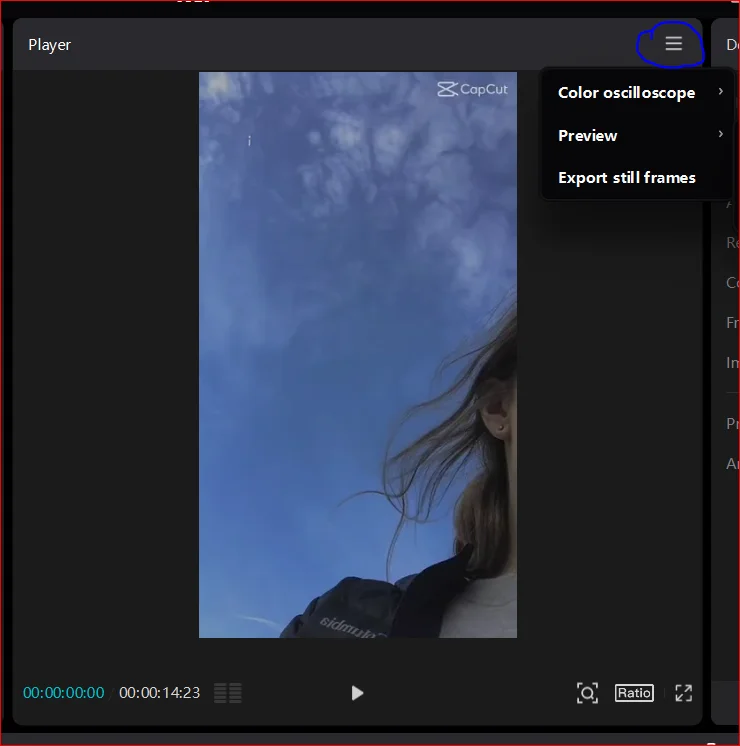
- Adjust Preview Quality: Within the Player settings, locate Preview Quality and switch it to Performance Priority. This setting prioritizes smooth playback while editing.
Utilizing Project Settings
After adjusting the preview quality, delve into the project settings to further optimize performance:
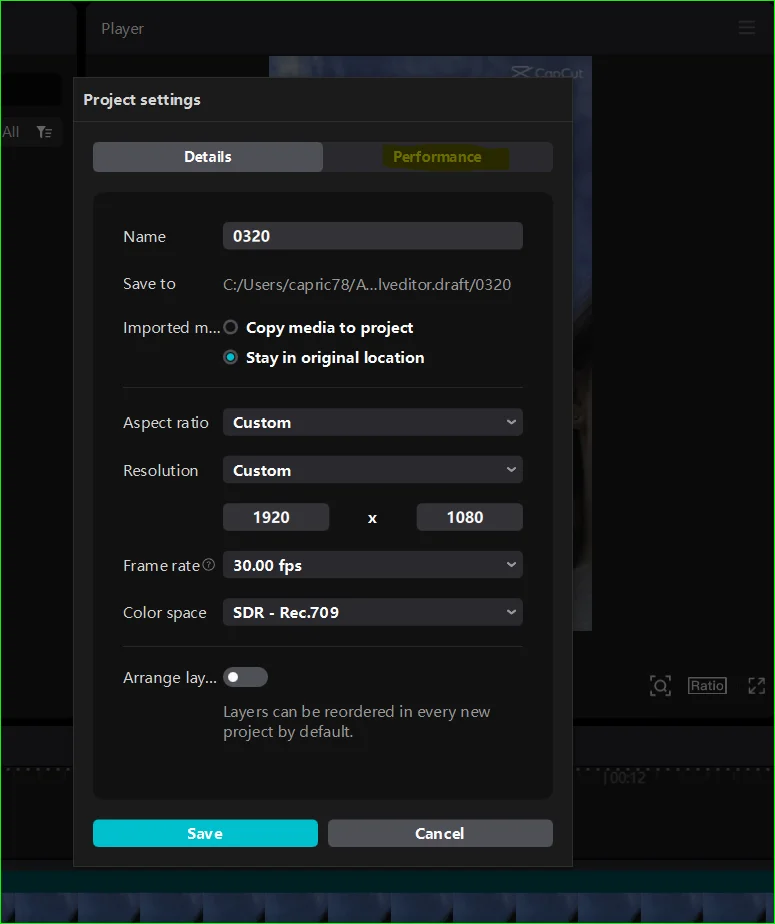
- Access Project Settings: Click on any blank area in the timeline to reveal project settings.
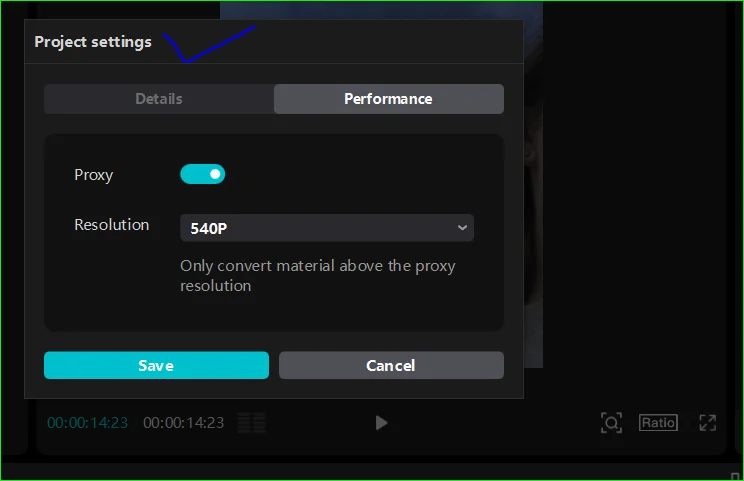
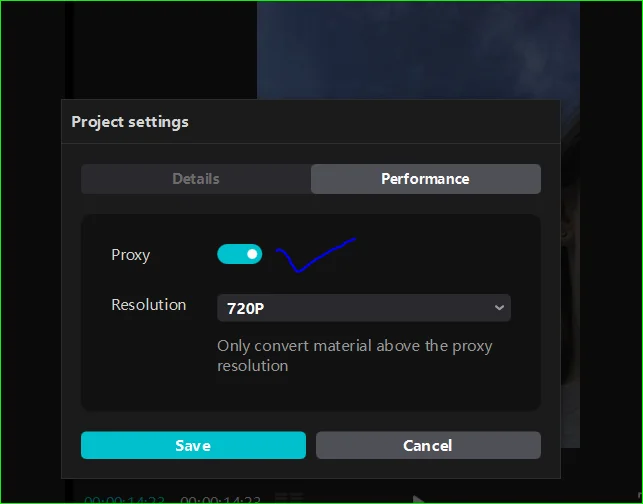
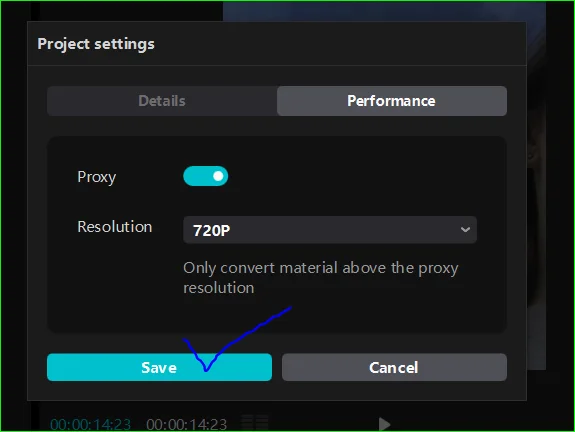
- Enable Proxy: Within the project settings, navigate to the Performance tab and enable Proxy. This feature accelerates editing without compromising video quality.
- Select Resolution: Choose the lowest available resolution, such as 540p, to minimize lag during playback. This temporary resolution adjustment ensures smoother editing without affecting the final output quality.
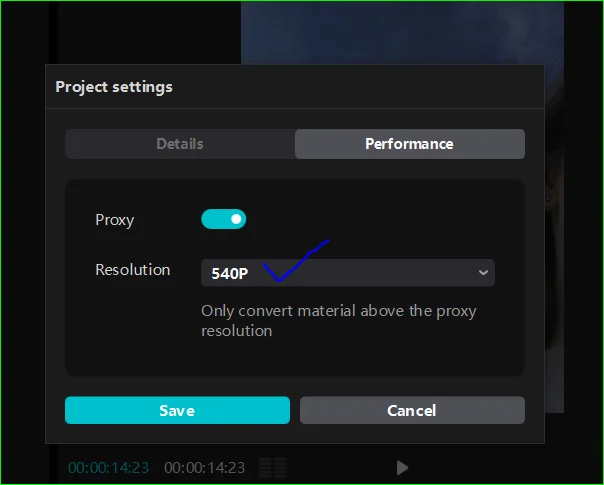
- Save Settings: After making these adjustments, save the project settings to apply the changes.
Additional Tips
- Regularly update CapCut to access the latest optimizations and features.
- Close unnecessary background applications to allocate more system resources to CapCut.
- Consider upgrading your PC hardware if lag issues persist, especially for handling larger video projects.
Conclusion
By following these steps, users can effectively utilize Performance Priority mode in CapCut to mitigate lag issues during editing sessions. Enabling Proxy and selecting a lower resolution optimizes performance without compromising the quality of the final video output. With these optimizations, users can enjoy a seamless editing experience on CapCut.
FAQs
Q. Where can I find project settings in CapCut?
Access Project Settings: Click on any blank area in the timeline to reveal project settings.
Q. How do I see my projects on CapCut?
To see your projects on CapCut, click on the menu icon and then navigate to the home page.
Q. How do I change my timeline on CapCut?
To change your timeline on CapCut, import the desired video footage by tapping on the “+” button and selecting the video from your gallery. Then, add the video to the timeline.
Q. How do I give permission to edit CapCut?
To give permission to edit in CapCut, during video editing, click the “…” icon, then select “Transfer editing permission” at the top right corner of the video editor. Choose the member to whom you want to transfer the editing permission, then click “Confirm,” allowing that member to start editing.
Q. How do I change project settings?
To change project settings in CapCut, follow these steps:
- Open the project you want to modify.
- Click on the left-menu option labeled “Project Settings.”
- Click on “Edit.”
- Make the necessary changes to the Project Name.
- Finally, click “Save” to apply the changes.
Q. Where is project settings premiere?
To access project settings in Premiere Pro, follow these steps:
- Choose “Edit” from the menu bar.
- Select “Project Settings,” then choose “General.”
- In the Project Settings dialog box, you can specify project settings for General, Capture, and Video Rendering.
- Finally, click “OK” to confirm the changes.
Q. Does CapCut have a timeline?
Yes, CapCut does have a timeline feature. You can access timeline templates by searching for “timeline” in the template search bar. Choose a template that suits your needs and customize it by adding your own information, dates, events, or milestones.
Q. How do I use CapCut template?
Yes, you can share your CapCut project once it’s exported. You can directly share the exported video on various social media platforms such as TikTok, YouTube, Facebook, Instagram, and more.
Q. Can I share my CapCut project?
Yes you can share your projecYes, once your CapCut project is exported, you can easily share it through various methods. This includes direct sharing on popular social media platforms such as TikTok, YouTube, Facebook, Instagram, and moret